Pineapple juice cake recipe: 5 easy steps for a tropical treat
Pineapple juice cake recipe: 5 easy steps for a tropical treat
By Chef••Fruit Desserts and Bakes
Looking for a moist, tropical dessert? This pineapple juice cake recipe delivers sweet, tangy flavor in just 5 easy steps. Perfect for summer gatherings or a sunny treat any day. Try it now!
Table of Contents
Introduction
What Exactly is Pineapple Juice Cake? A Brief History
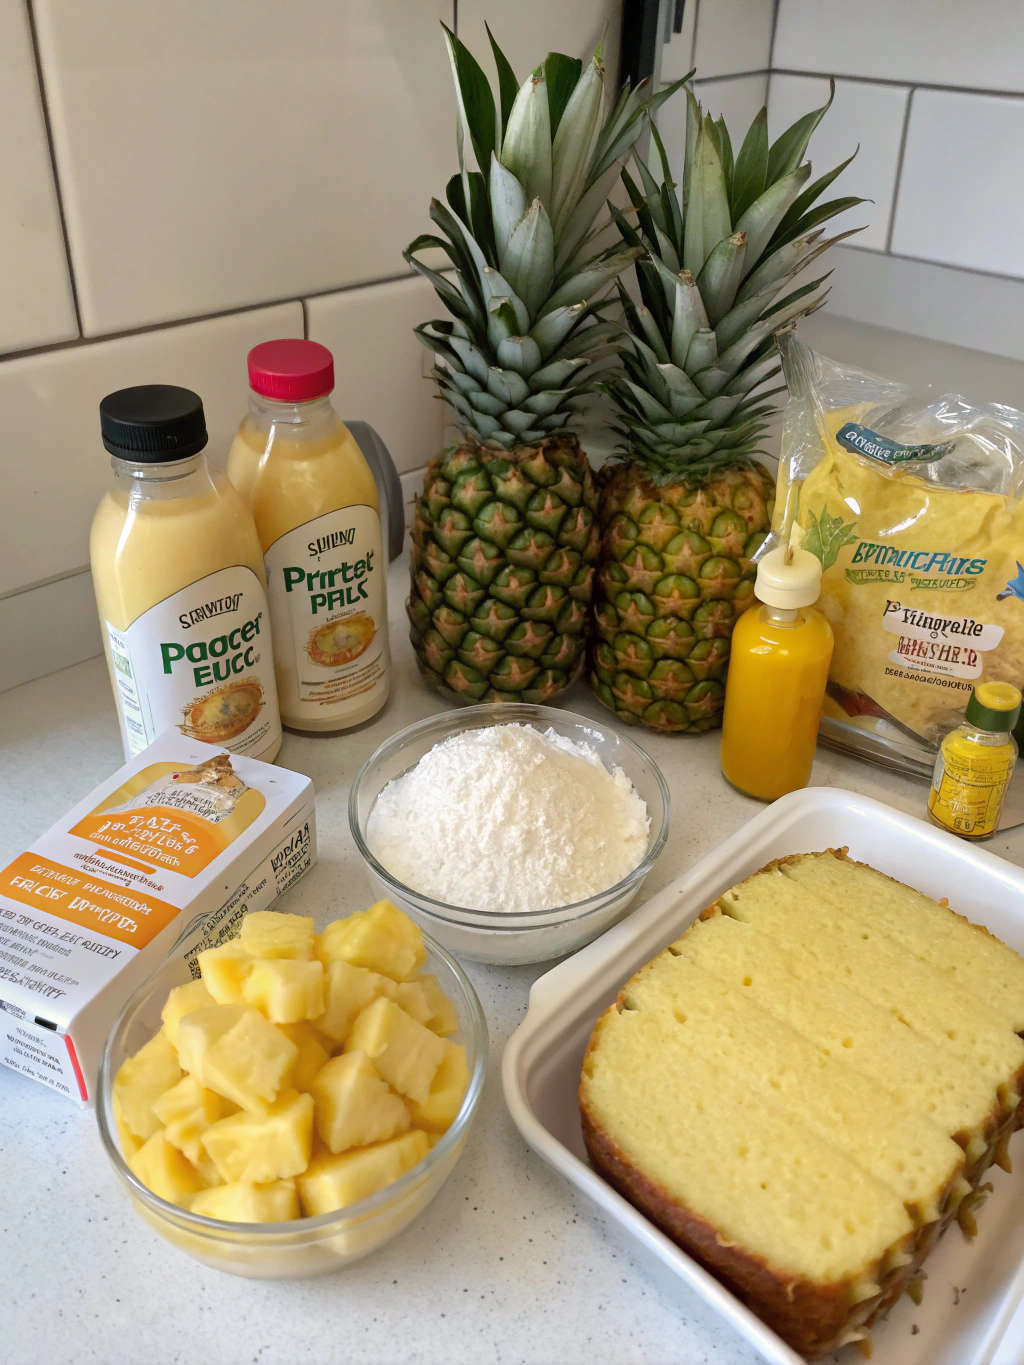
The Ingredients You’ll Need
Essential Kitchen Equipment
Step-by-Step Cooking Instructions for Perfect Pineapple Juice Cake
Phase 1: Prep & Batter
Phase 2: Baking & Syrup Prep
Phase 3: The Transformative Soak
Phase 4: Finishing Touches
Chef Chef’s Insider Techniques
The Temperature Tango
Syrup Saturation Strategy
Patience Pays
Troubleshooting Common Pineapple Juice Cake Issues
Problem: Soggy Bottom
Problem: Sticks to Pan
Problem: Too Sweet
Creative Variations to Try
Tropical Coconut Twist
Spiced Rum Infusion
Caramelized Pineapple Topping
Storage, Freezing, and Reheating Instructions
Short-Term Storage
Freezing for Longevity
Reviving Leftovers
Frequently Asked Questions about Pineapple Juice Cake
Can I use fresh pineapple juice?
Why didn’t my cake absorb all the syrup?
Can I make this gluten-free?
How do I prevent a gummy texture?
Conclusion: Your Culinary Adventure Awaits
Introduction
The scent of caramelized pineapple takes me straight back to my culinary school days in Hawaii. I remember Chef Akoni sliding a golden-brown cake across the counter, condensation glistening on the glass plate. “Taste the islands,” he’d said. That first bite of impossibly moist pineapple juice cake – tangy, sweet, and humming with tropical vibes – sparked my lifelong obsession. Today, I’ve perfected that memory into a foolproof recipe that brings sunshine to any kitchen, even on the grayest days.
What Exactly is Pineapple Juice Cake? A Brief History
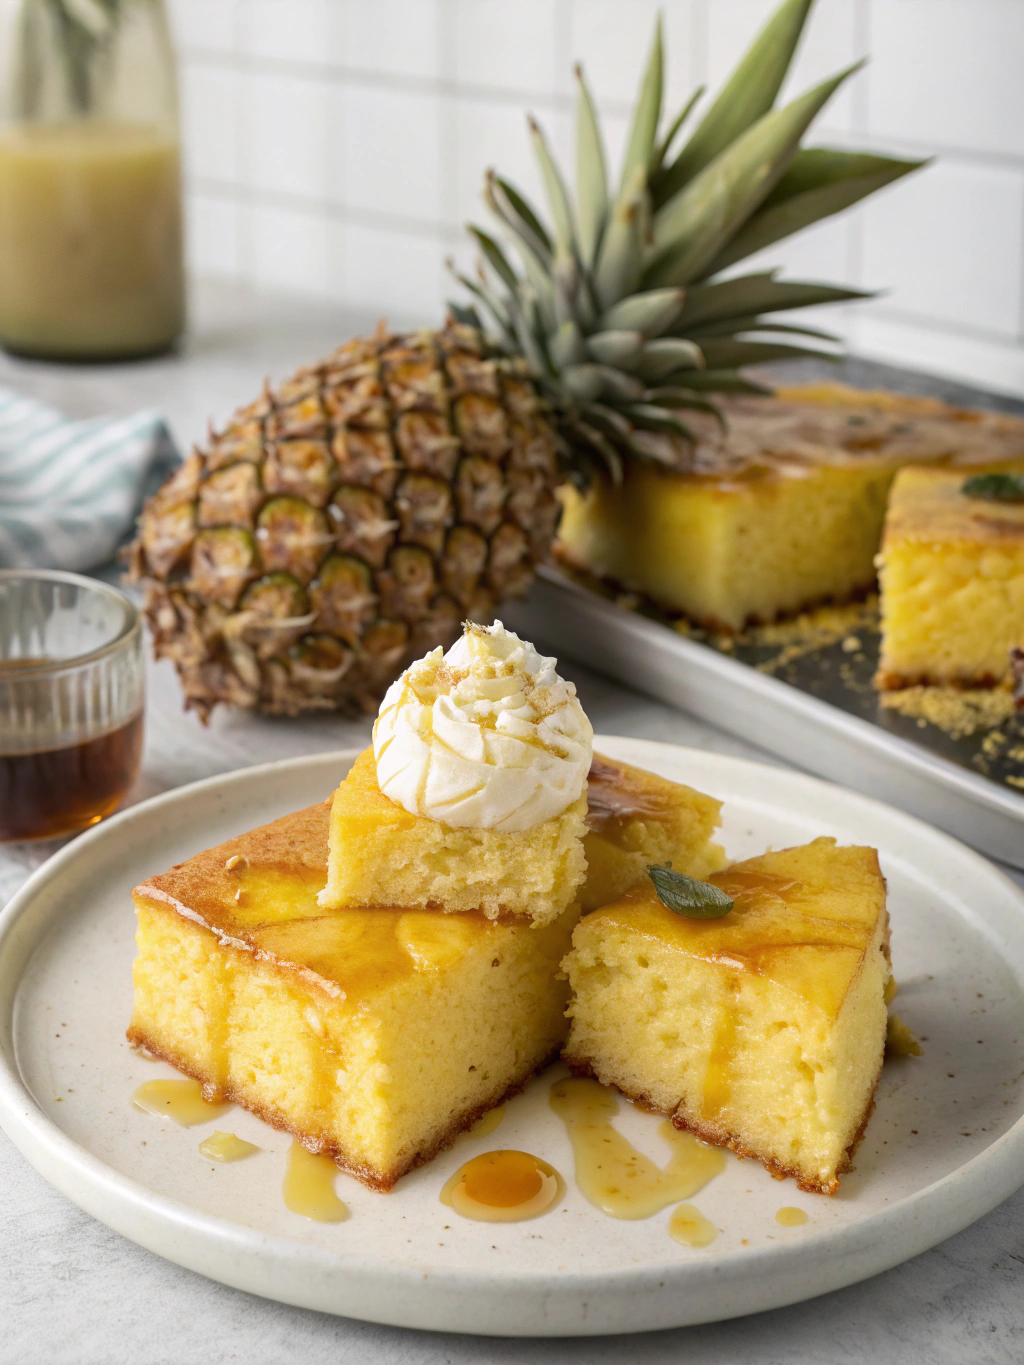
Born from Southern ingenuity and tropical abundance, pineapple juice cake emerged when resourceful home bakers discovered canned pineapple juice could transform simple cakes into moist masterpieces. Unlike pineapple upside-down cake with its fruit topping, this beauty soaks the entire cake in pineapple syrup after baking. The result? A tender crumb that sings with bright acidity balanced by caramel notes. It became a potluck superstar in the 1960s when canned pineapple became widely available, and it remains a nostalgic favorite that tastes like summer vacation.
The memory is a treasure, but the cake is one to be shared. Let me show you just how easy it is to bake a little sunshine of your own.
Flour-based baking spray: Ensures clean release every time
Instant-read thermometer: Takes guesswork out of baking (cake is done at 210°F)
Wooden skewers: For poking syrup channels
Step-by-Step Cooking Instructions for Perfect Pineapple Juice Cake
Phase 1: Prep & Batter
Preheat oven to 350°F (175°C). Generously coat Bundt pan with flour-based baking spray, paying extra attention to crevices.
Whisk flour, sugar, baking powder, and salt in a large bowl until no lumps remain.
In separate bowl, beat eggs 1 minute until frothy. Gradually stream in oil while mixing, then add vanilla and milk.
Pour wet ingredients into dry ingredients. Mix on low speed just until combined (about 30 seconds - batter will be thick).
Phase 2: Baking & Syrup Prep
Spread batter evenly in prepared pan. Bake 45-50 minutes until golden and thermometer reads 210°F (99°C).
While cake bakes, combine pineapple juice, brown sugar, and butter in saucepan. Simmer 8 minutes until slightly thickened. Remove from heat, stir in extract if using.
Phase 3: The Transformative Soak
Place hot cake (still in pan) on cooling rack. Poke 50+ deep holes all over with skewer.
Slowly pour ¾ of hot syrup over cake, pausing to let it absorb. Reserve remaining syrup.
Cool cake completely in pan (2 hours minimum - this allows syrup distribution).
Phase 4: Finishing Touches
Invert cake onto serving plate. Warm reserved syrup and brush over surface for glossy finish.
Chef Chef’s Insider Techniques
The Temperature Tango
Room temperature eggs and milk incorporate more air, creating a lighter crumb that better absorbs syrup. Take them out 2 hours before baking.
Syrup Saturation Strategy
Poke holes while cake is piping hot - the steam escaping creates channels for syrup penetration. Pour syrup in 3 stages, waiting 2 minutes between pours.
Patience Pays
Resist unmolding for at least 2 hours. This resting period allows the syrup to redistribute evenly, preventing soggy spots.
Troubleshooting Common Pineapple Juice Cake Issues
Problem: Soggy Bottom
Fix: Ensure oven is fully preheated and use thermometer to avoid underbaking. Next time, reduce syrup by ¼ cup.
Problem: Sticks to Pan
Fix: Immediately return pan over cake for 10 minutes. The steam loosens it. Always use flour-based spray (not just oil).
Problem: Too Sweet
Fix: Balance by adding 1 tbsp lemon juice to syrup or serve with unsweetened whipped cream.
Creative Variations to Try
Tropical Coconut Twist
Replace ¼ cup flour with coconut flour and add ½ cup toasted coconut to batter. Use coconut milk instead of dairy milk.
Spiced Rum Infusion
Add 2 tbsp dark rum to syrup. Serve with rum-chantilly cream: whip 1 cup cream with 2 tbsp rum and 1 tbsp brown sugar.
Caramelized Pineapple Topping
Sauté 1 cup diced pineapple in 2 tbsp butter until caramelized. Arrange in pan before adding batter for upside-down effect.
Storage, Freezing, and Reheating Instructions
Short-Term Storage
Cover with cake dome at room temperature up to 3 days. The syrup acts as a natural preservative.
Freezing for Longevity
Wrap unsoaked cake tightly in plastic, then foil. Freeze up to 3 months. Thaw overnight, then soak with warm syrup.
Reviving Leftovers
Microwave single slices 12 seconds or warm entire cake 10 minutes at 300°F (150°C) covered with foil.
Frequently Asked Questions about Pineapple Juice Cake
Can I use fresh pineapple juice?
Absolutely! Use 2 ripe pineapples. Core, blend flesh, and strain through cheesecloth. Reduce syrup simmer time to 6 minutes.
Why didn’t my cake absorb all the syrup?
This usually means under-poking or pouring syrup too fast. Next time, poke more holes and pour in smaller increments.
Can I make this gluten-free?
Yes! Substitute flour with 1:1 gluten-free blend + ½ tsp xanthan gum. Results are equally moist.
How do I prevent a gummy texture?
Measure flour correctly (spoon into cup, level off). Overmixing develops gluten - stop when just combined.
Conclusion: Your Culinary Adventure Awaits
This pineapple juice cake is more than dessert - it’s edible sunshine that turns any day into a celebration. With its crackly caramelized crust giving way to a juicy, tender interior, each bite transports you to warmer shores. 👩🍳 Let’s keep cooking together! Follow me, Chef, for daily tips, recipes & meaty inspiration: Instagram{.} • Pinterest{.} • YouTube{.} 👉 For more like this, discover new ideas here