How to Make Perfect Crispy Smashed Brussels Sprouts Every Time
Tired of soggy Brussels sprouts? Master crispy smashed Brussels sprouts with easy tips for golden, crunchy perfection every time. Try this foolproof recipe now!
Table of Contents
- What Exactly Are Crispy Smashed Brussels Sprouts? A Brief History
- The Ingredients You’ll Need
- Essential Kitchen Equipment
- Step-by-Step Cooking Instructions for Perfect Crispy Smashed Brussels Sprouts
- Phase 1: Prep & Blanch
- Phase 2: Smash & Season
- Phase 3: The Crisp Factor
- Chef Chef’s Insider Techniques
- The Dryness Doctrine
- The Weighted Smash
- Acid Timing
- Troubleshooting Common Crispy Smashed Brussels Sprouts Issues
- Creative Variations to Try
- The Perfect Pairings: What to Serve With Crispy Smashed Brussels Sprouts
- Protein Partners
- Sauce Synergies
- Beverage Matches
- Storage, Freezing, and Reheating Instructions
- Frequently Asked Questions About Crispy Smashed Brussels Sprouts
- Can I skip the blanching step?
- Why aren’t my sprouts getting crispy?
- Can I make these without dairy?
- How do I prevent bitter sprouts?
- Conclusion: Your Culinary Adventure Awaits
I still remember the first time I truly fell for Brussels sprouts. It was during my externship at a farm-to-table bistro in Vermont, where Chef Marco handed me a sheet pan of these tiny cabbages with a challenge: “Make people crave these.” After three failed batches (soggy, then burnt, then bland), I finally discovered the magic of smashed Brussels sprouts. That crispy-edged, tender-centered revelation became my culinary obsession – and today, I’m sharing every secret so you can achieve perfect crispy smashed Brussels sprouts on your first try!
What Exactly Are Crispy Smashed Brussels Sprouts? A Brief History
While roasted Brussels sprouts date back to medieval Europe, the smashed technique is a modern innovation born from our love of textural contrast. By flattening par-cooked sprouts before roasting, we maximize surface area for that irresistible crunch. Unlike steamed or boiled versions, this method transforms the humble sprout into crispy-edged wonders with creamy centers – a technique popularized by chefs like David Chang in the early 2000s that’s now a global phenomenon.
The Ingredients You’ll Need
- 1.5 lbs Brussels sprouts (uniform small-to-medium size)
- 3 tbsp extra-virgin olive oil (plus extra for drizzling)
- 1 tbsp balsamic vinegar (aged for depth)
- 4 garlic cloves, thinly sliced
- ½ cup freshly grated Parmesan (Parmigiano-Reggiano preferred)
- 1 tsp smoked paprika
- ½ tsp red pepper flakes (optional)
- Sea salt & black pepper to taste
- Lemon zest from ½ lemon (finishing touch)
Pro Tip: Choose sprouts with tight, bright green leaves – avoid yellowing or loose ones. The Parmesan should be freshly grated; pre-shredded contains anti-caking agents that inhibit crisping.
Essential Kitchen Equipment
- Heavy baking sheet (rimmed, half-sheet size)
- Parchment paper (prevents sticking without steaming)
- Potato masher or sturdy glass (for smashing)
- Spider strainer (for safe blanching)
- Microplane (for fine Parmesan grating)
Step-by-Step Cooking Instructions for Perfect Crispy Smashed Brussels Sprouts
Phase 1: Prep & Blanch
- Preheat oven to 425°F (220°C) with rack in center position. Line baking sheet with parchment.
- Trim Brussels sprout stems and remove any loose outer leaves. Halve any larger sprouts (over 1.5″ diameter) so all are roughly equal size.
- Bring salted water to boil in large pot. Blanch sprouts for 8 minutes until just fork-tender but not mushy.
- Drain immediately and plunge into ice water for 1 minute to halt cooking. Drain thoroughly and pat completely dry with kitchen towels.
Phase 2: Smash & Season
- Arrange sprouts in single layer on prepared sheet. Using potato masher or bottom of glass, firmly press each until flattened to ½-inch thickness.
- Drizzle evenly with olive oil and balsamic vinegar. Gently lift sprouts to ensure oil flows underneath.
- Sprinkle with sliced garlic, smoked paprika, red pepper flakes (if using), salt, and pepper.
Phase 3: The Crisp Factor
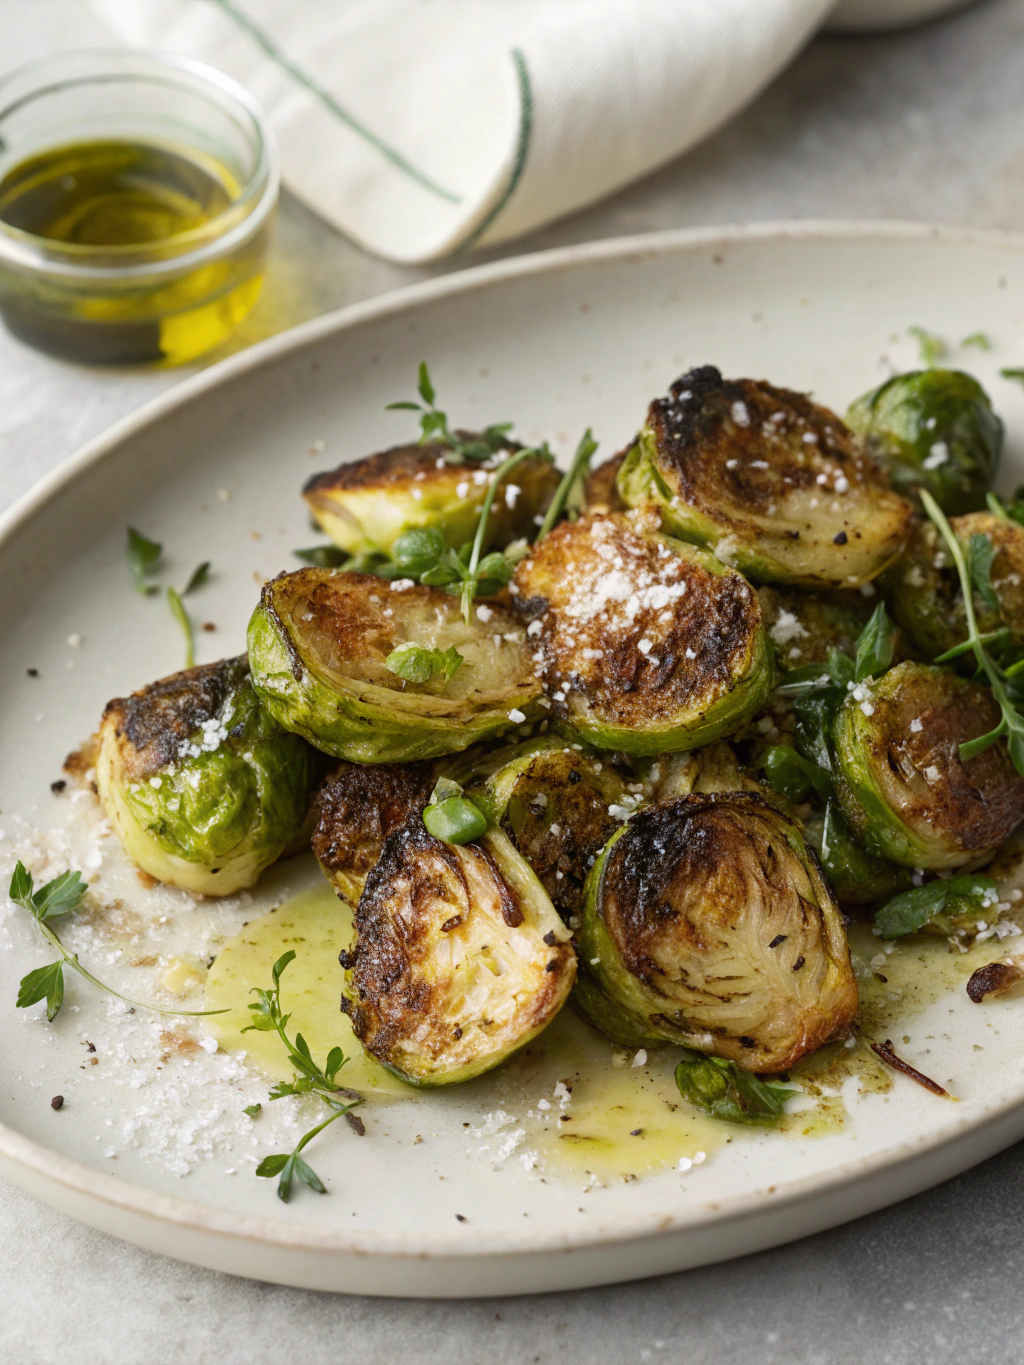
- Roast for 15 minutes. Remove from oven and sprinkle Parmesan evenly over sprouts.
- Return to oven for 10-12 minutes until edges are deeply caramelized and cheese forms crispy lace.
- Finish with lemon zest. Serve immediately for maximum crispness.
Chef Chef’s Insider Techniques
The Dryness Doctrine
Moisture is the enemy of crispness. After blanching, spin sprouts in a salad spinner, then blot aggressively with paper towels. Even small amounts of residual water will steam them in the oven.
The Weighted Smash
Place a second heavy baking sheet atop sprouts during the first 10 minutes of roasting. This presses them firmly against the hot surface, accelerating caramelization.
Acid Timing
Adding balsamic before roasting (not after) allows it to reduce into a sweet glaze that amplifies browning without burning.
Troubleshooting Common Crispy Smashed Brussels Sprouts Issues
- Problem: Soggy centers
Fix: Blanch 2 minutes less and increase oven temp to 450°F for final 5 minutes - Problem: Burnt edges
Fix: Place baking sheet on higher rack and tent with foil after cheese melts - Problem: Sprouts sticking
Fix: Ensure adequate oil under each sprout before smashing
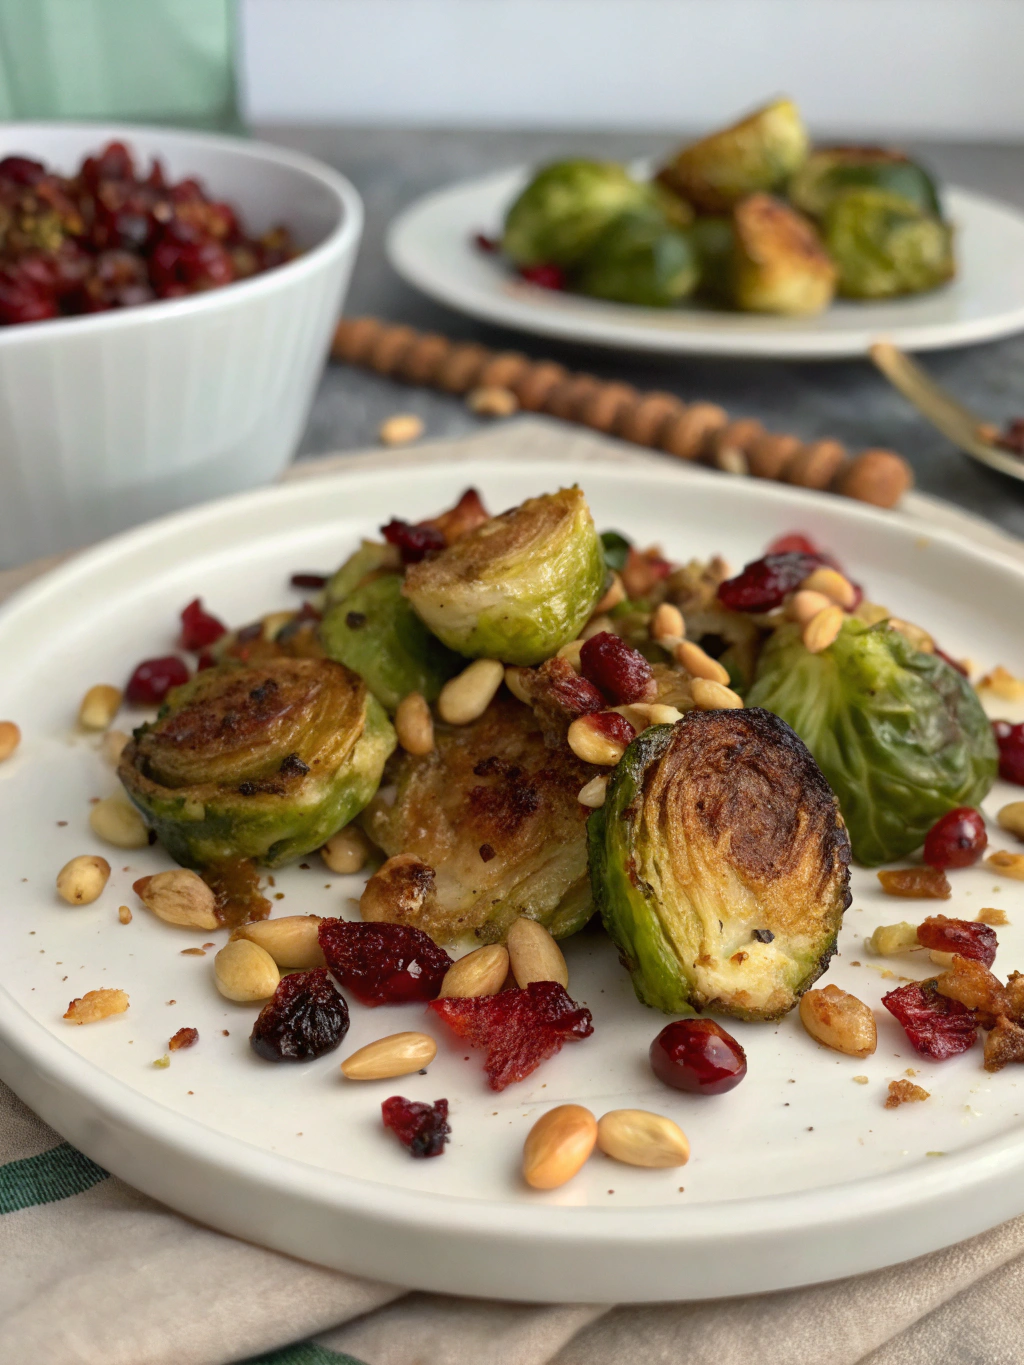
Creative Variations to Try
- Prosciutto & Honey: Top with crispy prosciutto bits and drizzle with warm honey
- Buffalo Style: Toss with hot sauce after roasting, serve with blue cheese crumbles
- Mediterranean: Swap Parmesan for feta, add chopped Kalamata olives and oregano
The Perfect Pairings: What to Serve With Crispy Smashed Brussels Sprouts
Protein Partners
- Garlic-butter basted steak
- Pan-seared salmon with dill cream
- Roast chicken with herb jus
Sauce Synergies
- Lemon aioli
- Chili-cranberry compote
- Truffle-infused yogurt
Beverage Matches
- Crisp pilsner or saison beer
- New Zealand Sauvignon Blanc
- Smoked black tea (non-alcoholic)
Storage, Freezing, and Reheating Instructions
Fridge: Store in airtight container for up to 3 days. Reheating: Spread on baking sheet and toast at 400°F for 8 minutes to restore crispness. Avoid microwaving.
Freezing: Freeze before adding cheese. Blanch and dry sprouts, arrange unsmashed on parchment-lined tray. Freeze solid, then transfer to bags. When ready, thaw, smash, and roast as directed with cheese.
Frequently Asked Questions About Crispy Smashed Brussels Sprouts
Can I skip the blanching step?
Blanching is non-negotiable for creamy interiors. Raw sprouts won’t soften sufficiently during roasting after smashing.
Why aren’t my sprouts getting crispy?
Overcrowding is the main culprit. Ensure at least ½ inch between smashed sprouts for proper air circulation.
Can I make these without dairy?
Absolutely! Nutritional yeast or vegan Parmesan provide similar umami. For nut-free, use toasted breadcrumb-herb mix.
How do I prevent bitter sprouts?
Choose younger, smaller sprouts (under 1.5″ diameter). The blanching step also significantly reduces bitterness.
Conclusion: Your Culinary Adventure Awaits
Once you master this technique, those crispy-edged, caramelized Brussels sprouts will become your secret weapon for turning veggie skeptics into devoted fans. Remember: dryness, high heat, and fearless smashing are your allies.
👩🍳 Let’s keep cooking together!
Follow me, Chef, for daily tips, recipes & meaty inspiration:
Instagram{.} • Pinterest{.} • YouTube{.}
👉 For more like this, discover new ideas here